IPv4
From $0.72 for 1 pc. 37 countries to choose from, rental period from 7 days.
IPv4
From $0.72 for 1 pc. 37 countries to choose from, rental period from 7 days.
IPv4
From $0.72 for 1 pc. 37 countries to choose from, rental period from 7 days.
IPv6
From $0.07 for 1 pc. 14 countries to choose from, rental period from 7 days.
ISP
From $1.35 for 1 pc. 23 countries to choose from, rental period from 7 days.
Mobile
From $14 for 1 pc. 18 countries to choose from, rental period from 2 days.
Resident
From $0.70 for 1 GB. 200+ countries to choose from, rental period from 30 days.
Use cases:
Use cases:
Tools:
Company:
About Us:
Unlike some browsers, Safari does not include built-in proxy settings. Instead, it relies entirely on your device’s system-wide network configuration. Whether you're aiming to enhance your online privacy, bypass geo-restrictions, or manage traffic routing, configuring a Safari proxy requires adjusting macOS or iOS network settings.
In this guide, we’ll walk you through the full process of setting up a Safari proxy on both macOS and iPhone – step by step.
Please follow these simple considerations for configuration on macOS:
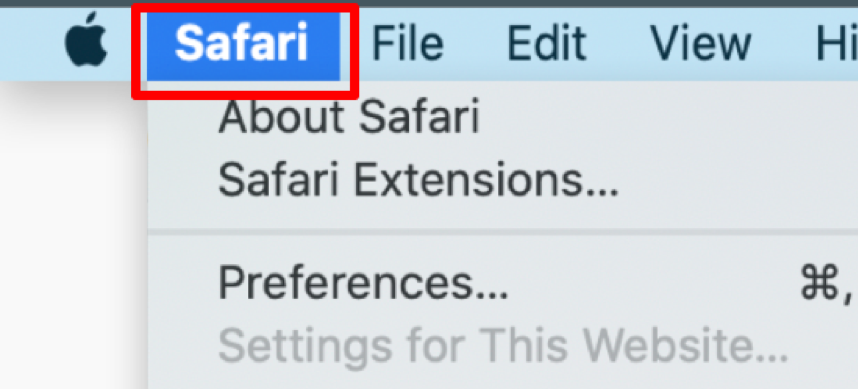
Firstly, click the Safari tab. It is present on the top left of your screen in the macOS menu bar. This will open a drop-down menu.
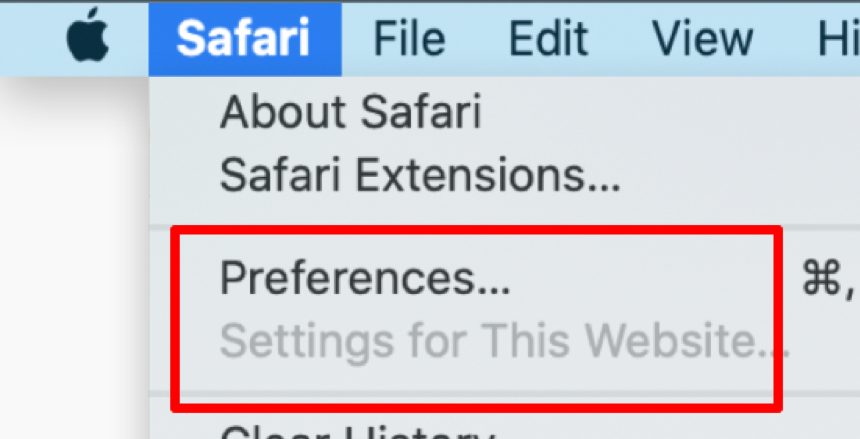
Now, you can see a window on your screen where you can manage all your configurable Safari browser preferences. It also includes privacy, security, and advanced options for browsing.
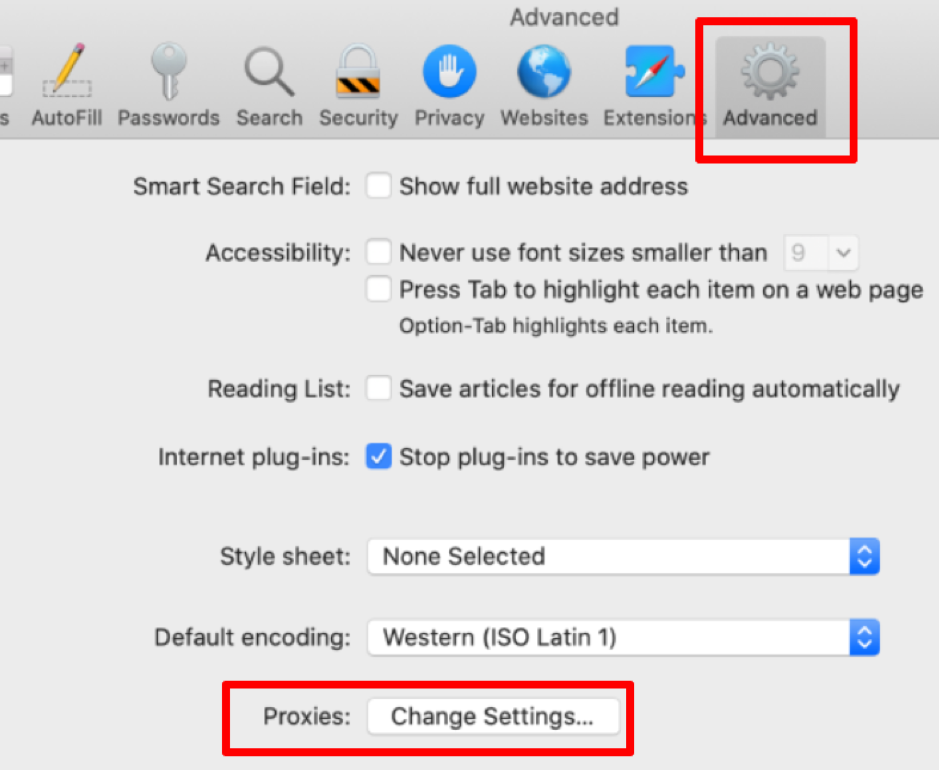
Here, you need to search for the Proxies section. It is present at the bottom of your window. Now, click the Change Settings… button. It will help you access macOS network preferences.

Here, a new network window will appear on your screen. Choose an active network connection. It is usually Wi-Fi or Ethernet. The next thing you have to do is click on the Proxies tab.
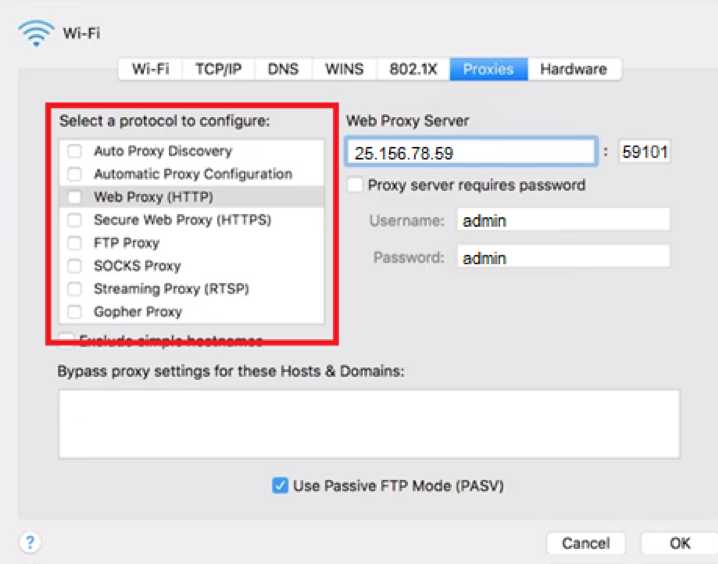
Now, move ahead and choose the intermediary server protocol you want to configure. For example, HTTP, HTTPS, FTP, SOCKS, or RTSP, for Safari proxy setup we are going to use HTTP one. Your provider will give you these details right after payment is done.
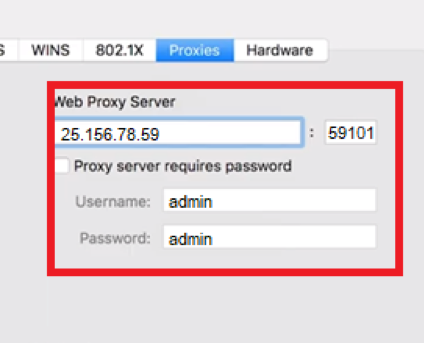
It is time to fill in your server’s IP address and port number. If there is a need for authentication, please check the box labeled Proxy server requires password. Here, you need to enter your provided username and password credentials.
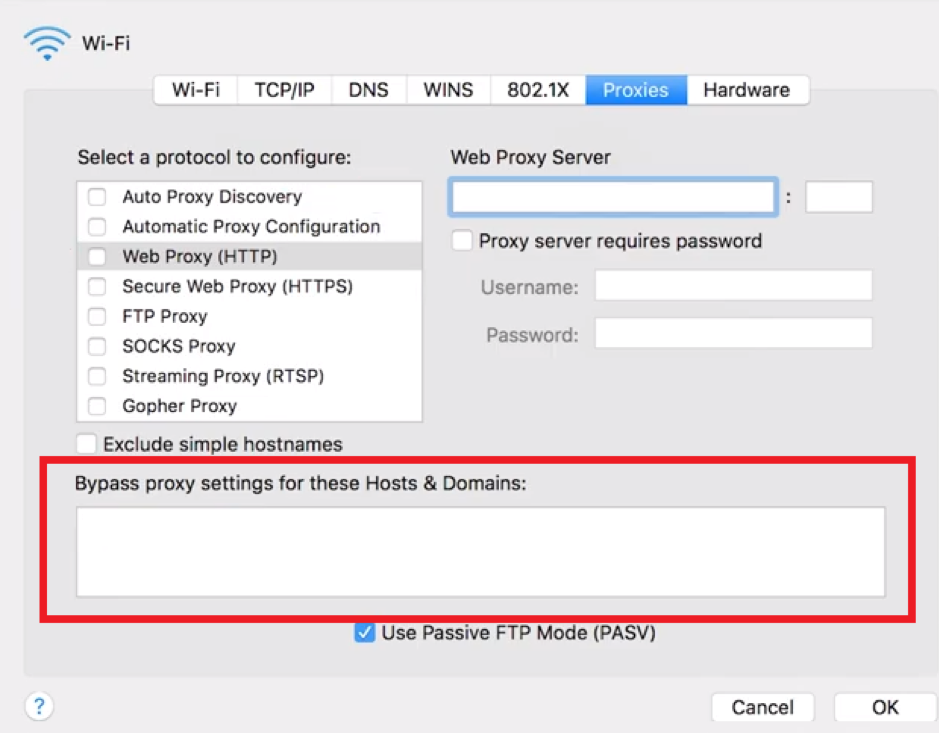
In this part, you may define the exceptions for some websites where implementations should not be applied. Bypass proxy settings for these Hosts & Domains is the field where you type the domains for which your browser will ignore the server settings.
Finally, click OK. It will save the desired changes. Now, your browser will use the specified connection for all your online traffic.
In case you want to disable the proxy in Safari – simply uncheck the boxes in the “Select a protocol to configure” section and hit Ok.
You can follow the steps below if you are using an iPhone:
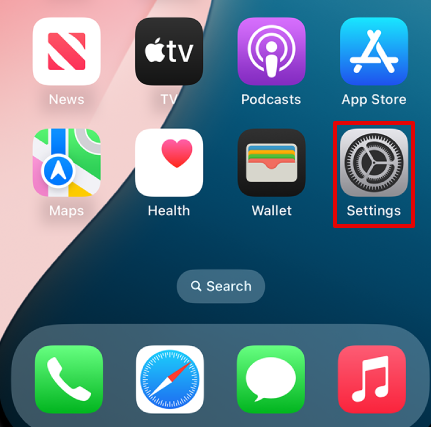
Locate the Settings app. Here, you can manage various device options. Also, Wi-Fi and network-related.
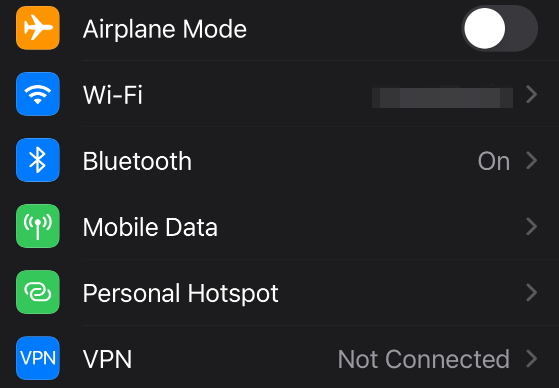
Now, tap Wi-Fi. In this section, there is a list of all available wireless networks. You need to ensure that you are connected to one.
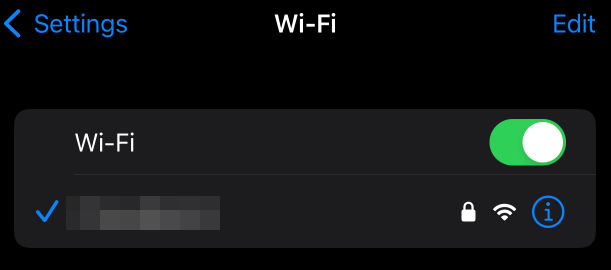
Here tap the small blue i icon next to its name. It will open the network-specific options. Here, you can configure DNS, IP, and other details.
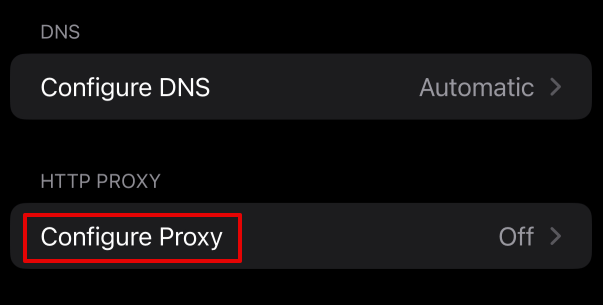
The next part involves finding an HTTP Proxy and tapping Configure Proxy for Safari. It allows users to adjust how their iPhone connects to the internet, like what IP will be used.
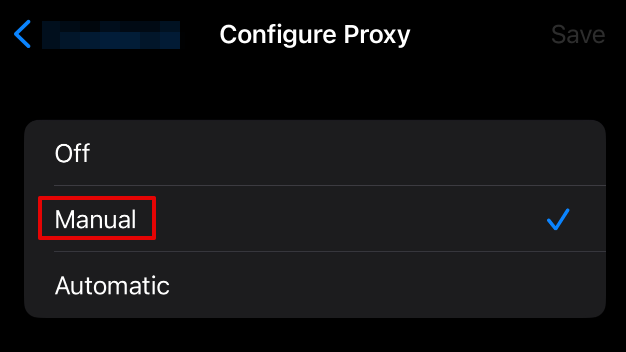
You will see the following options on the screen:
Select Manual. It allows you to enter your server information directly. It includes the IP address and port. These are usually provided by your service provider.

Enter your server details in the designated fields. It includes your server’s IP address or hostname and the port number.
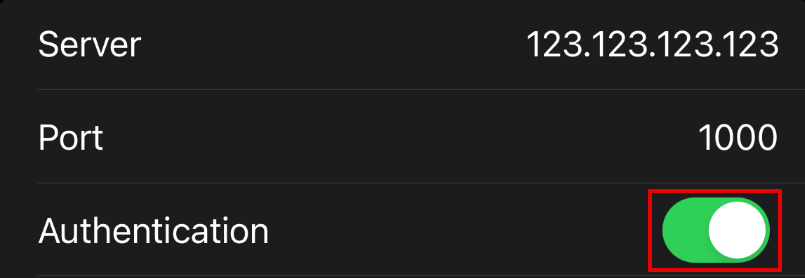
Suppose there is a need for authentication, toggle Authentication. Switch to enable it. This ensures that your connection will be secured properly.

Now, fill in the username and password. These details will verify your identity. Besides, the input of the correct details is important to avoid any connection issues while browsing.
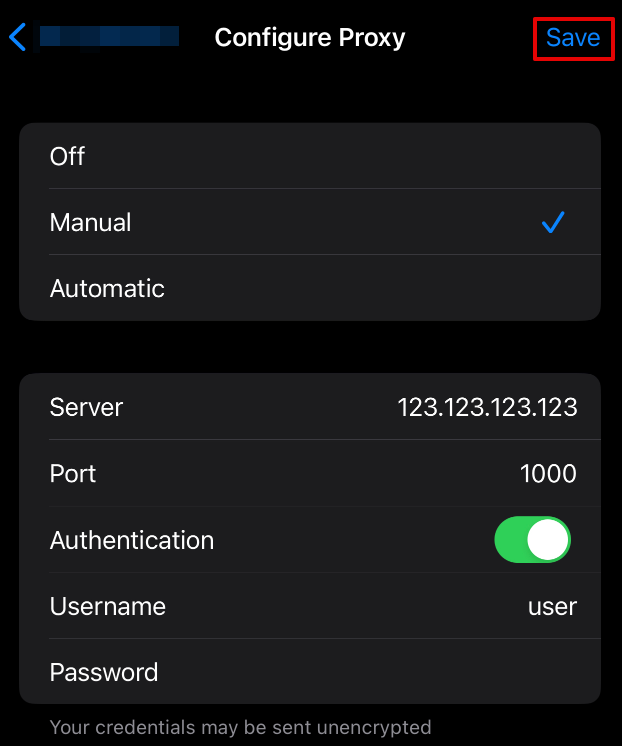
In the end, tap on the Save button. It is shown in the upper right corner. It confirms the application of server options to your selected Wi-Fi network.
Make sure to choose the Off option in the configuration menu in case you need to disable newly setted configuration.
It happens that there are some issues related to such type of settings on Mac or IOS devices. You may also encounter them. Let’s check a few of them:
Now, let’s have a quick discussion about the influence of the Safari proxy on data security. With the help of this setting, users get better data security as the server will act as an intermediary between the devices and the internet. It will help all the users to mask their IP addresses easily. Besides, it will make it hard for websites and other trackers to recognize or monitor your activity.
Moreover, proxies can help obscure your IP address and add a basic layer of separation between your device and the target server. While they do not encrypt your data like VPNs do, they can still reduce direct exposure of your real IP – especially when browsing through public networks such as unsecured Wi-Fi. Some advanced proxy services also include threat detection or IP rotation (read more about static vs. rotating proxies), which can further minimize tracking or malicious targeting.
Managing Safari proxy settings on macOS or iPhone is straightforward when using the built-in system preferences. This guide covered both setup and deactivation methods. However, keep in mind that Safari uses system-wide proxy rules, so all apps on your device will also be affected by these changes.
If you prefer to proxify only Safari or specific apps, consider using third-party tools like Proxifier on macOS or Shadowrocket on iOS. These tools allow app-level control over proxy routing without impacting the entire system.
