IPv4
From $0.72 for 1 pc. 37 countries to choose from, rental period from 7 days.
IPv4
From $0.72 for 1 pc. 37 countries to choose from, rental period from 7 days.
IPv4
From $0.72 for 1 pc. 37 countries to choose from, rental period from 7 days.
IPv6
From $0.07 for 1 pc. 14 countries to choose from, rental period from 7 days.
ISP
From $1.35 for 1 pc. 23 countries to choose from, rental period from 7 days.
Mobile
From $14 for 1 pc. 18 countries to choose from, rental period from 2 days.
Resident
From $0.70 for 1 GB. 200+ countries to choose from, rental period from 30 days.
Use cases:
Use cases:
Tools:
Company:
About Us:
SessionBox proxy server configuration enhances your browsing privacy. It helps you manage multiple sessions and thus improves efficiency. A user may require it for personal anonymity or professional tasks. For example, account management or market research. When you set up a server connection correctly, it helps each session run on a separate IP address. It prevents the tracking and session overlap risk.
There are different reasons to use the SessionBox proxy. It completely transforms the way you manage browsing sessions, and that’s how it’s done:
Every SessionBox can be assigned to a unique server. It shows that every session will come from a different user or location. This is especially helpful to manage multiple social media accounts on the same websites. The sites that track IPs won’t be able to detect the linked sessions. It will help in avoiding bans or restrictions.
With the SessionBox proxy, you get better online security. It keeps your real IP address hidden by reflecting a fake IP address. It adds a protection layer. And, keep your original location and identity private. On the other hand, websites and trackers will find it difficult to follow your activity. It improves the overall online protection.
Another common use case is bypassing geo-restrictions. Proxies allow users to emulate access from various countries, enabling them to bypass geo-blocks and conduct region-specific research. Besides, they can test the content visibility across regions. You can also conduct international market research. Using SessionBox, you can run each session at once with a country’s IP.
Quality proxies can provide more stable connections. It helps to avoid dropped sessions or lag. It is helpful when you want to run several tabs or accounts at once. Using the right server set-up, you can add multiple proxies to improve the speed. It will help you minimize the usual frustration while multitasking in SessionBox.
A SessionBox proxy for a single-server connection ensures that browsing remains isolated. You may use it for different reasons with a unique IP setup per session. However, you must learn the correct steps to use a SessionBox proxy.
The following steps are effective in configuring correctly:

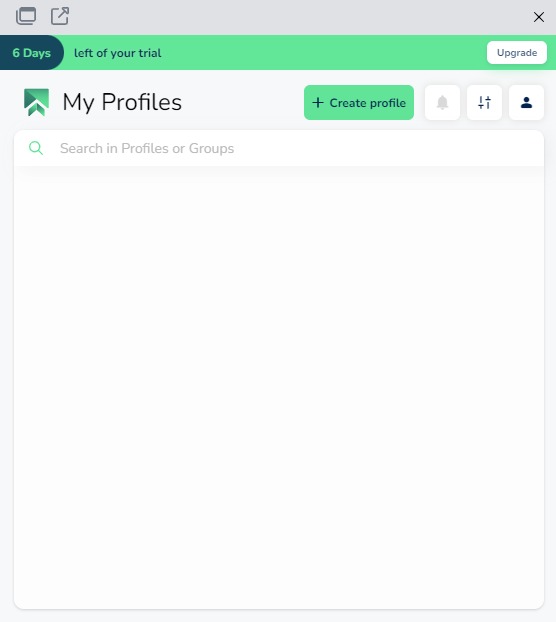
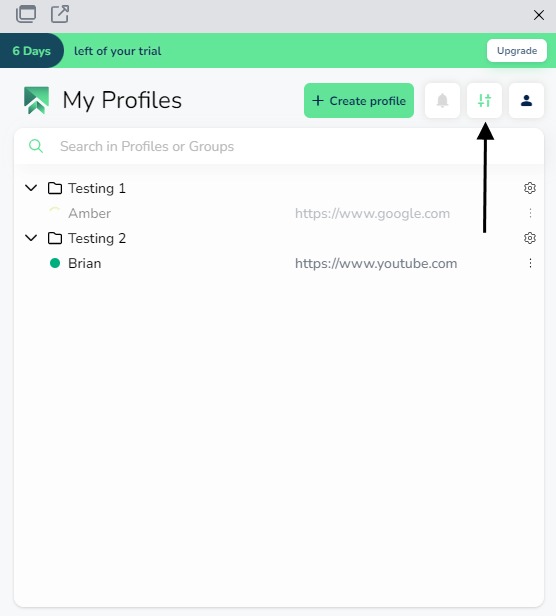
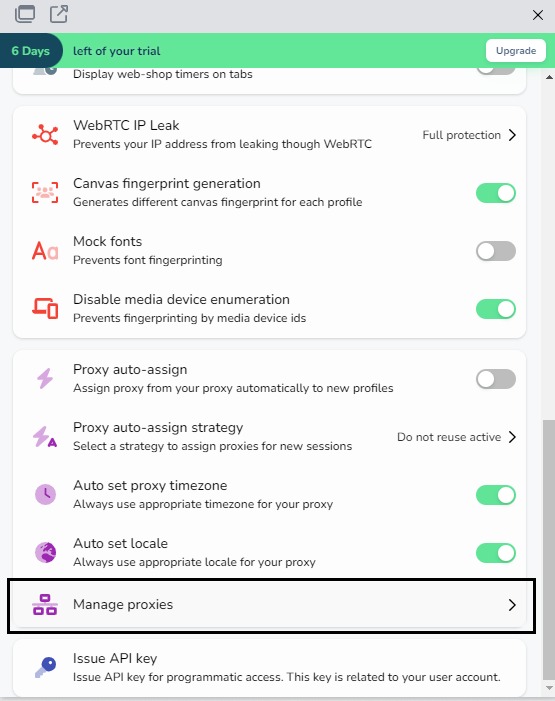
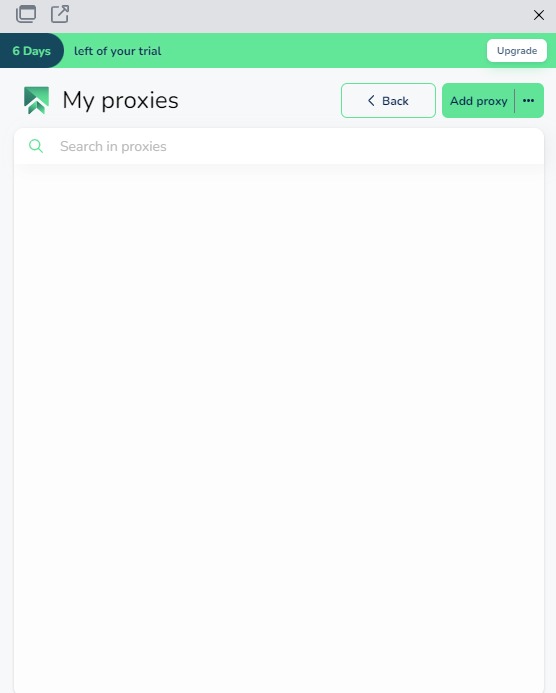
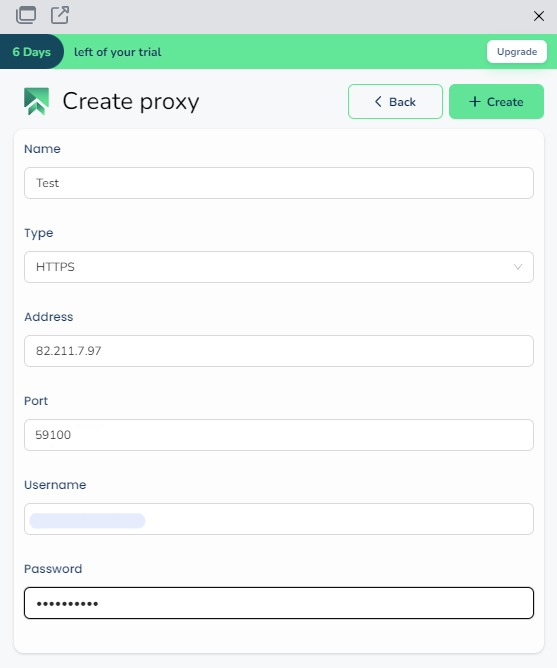
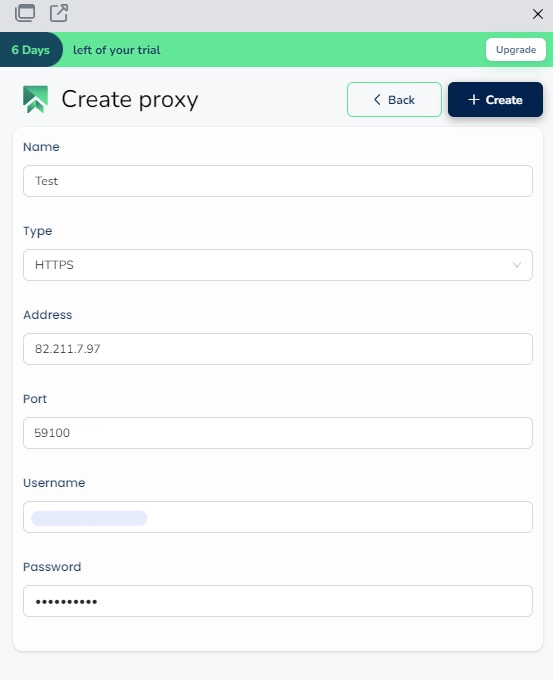
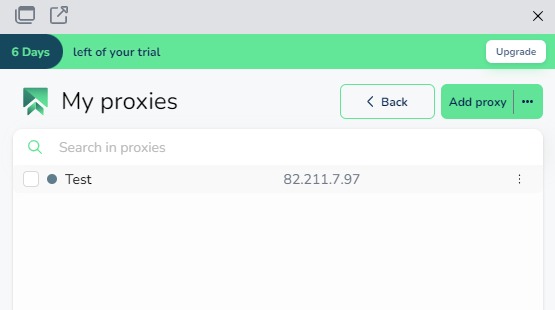
Users can further enhance efficiency by configuring a batch proxy list in SessionBox. Check the following steps for the right configuration:
NOTE: Make sure each proxy is on a new line.
Configuring a proxy in SessionBox helps maintain session separation and improve privacy across browser tasks. Understanding how to assign network routes correctly helps each profile operate with distinct network settings, which is critical for data management, account protection, and regional testing. Whether you're managing multiple accounts or monitoring websites, proper configuration avoids overlap and errors.
If you’re exploring similar tools for managing traffic per session, you can also read an article about a proxy helper extension with comparable functionality. These extensions differ in features, but both aim to control how traffic routes through unique identity containers for efficiency and clarity.
