IPv4
From $0.72 for 1 pc. 37 countries to choose from, rental period from 7 days.
IPv4
From $0.72 for 1 pc. 37 countries to choose from, rental period from 7 days.
IPv4
From $0.72 for 1 pc. 37 countries to choose from, rental period from 7 days.
IPv6
From $0.07 for 1 pc. 14 countries to choose from, rental period from 7 days.
ISP
From $1.35 for 1 pc. 23 countries to choose from, rental period from 7 days.
Mobile
From $14 for 1 pc. 19 countries to choose from, rental period from 2 days.
Resident
From $0.70 for 1 GB. 200+ countries to choose from, rental period from 30 days.
Use cases:
Use cases:
Tools:
Company:
About Us:
In this guide, you’ll learn how to properly configure a Proxifier proxy connection. A correct setup prevents connection issues, ensures application stability, and helps avoid common mistakes.
This configuration ensures that application traffic is routed to the appropriate endpoints. You might want to redirect browser activity or route specific API requests through a proxy. With the help of this step-by-step guide, you'll be able to create a reliable and effective configuration.
Users who want to have a more engaging learning experience can check this Video Proxifier Tutorial. It offers you a visual understanding of the process.
Proxifier proxy enables applications that lack native proxy support to operate using a reliable intermediary gateway. This is essential in corporate environments, testing setups, or restricted networks. When you understand how Proxifier reroutes the traffic, it allows you to have a seamless integration with server protocols.
The following points will help you more with learning how it works with proxies:
After understanding: what is Proxifier and its work principle, check its advantages also. There are several restrictions when you manage application traffic without an in-built server support. This app solves this issue by enabling precise control over the outbound connections. A user may want to monitor tools, scrape platforms, or internal software. With Proxifier proxy, you can easily route traffic using custom proxies efficiently.
The following are some highlighted benefits of using Proxifier to mask IP, access geo-restricted content, and more :
The following steps are helpful to learn how to use Proxifier to set up new connection using the easy approach:
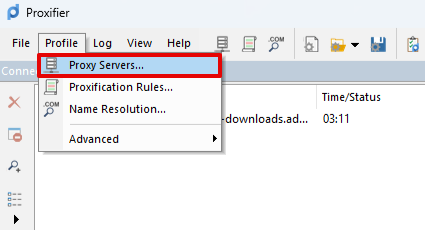
STEP 1: After launching the app, choose the Profile tab and next select Proxy Servers.
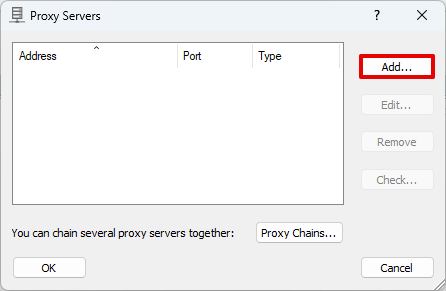
STEP 2: A window will open. Click on Add. (Later on, the same window will be used to add new servers.)
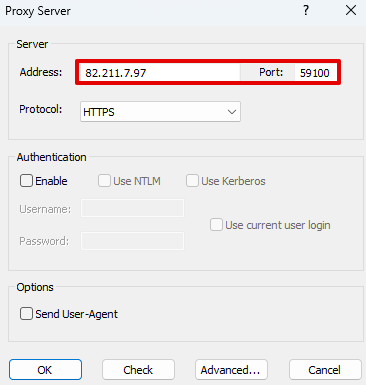
STEP 3: In the window that is open, fill in the IP address and Port.
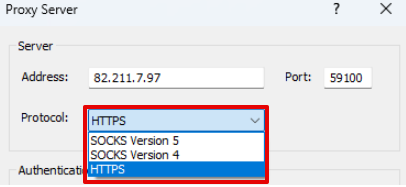
STEP 4: Next, choose the type of protocol for your intermediary gateway.
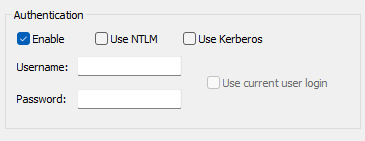
STEP 5: When you have a personal server with a Username and Password, tick the box in front of Enable. Now, enter the data.
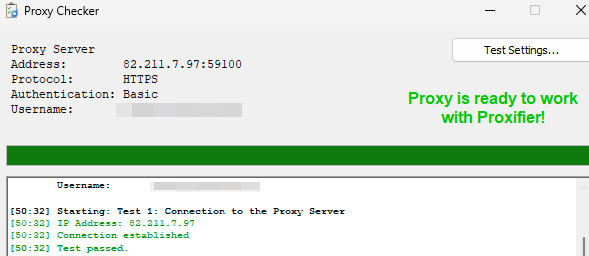
STEP 6: At this point, check if the server is working. Here, click the Check button and see the results. If you see a 'Testing Failed' message, double-check the IP, port, and credentials. Some failures may also result from firewall blocks or restricted IP access from the provider.

When you notice a green approving inscription, it reflects that everything is fine to continue.
STEP 7: Now, click the OK button.

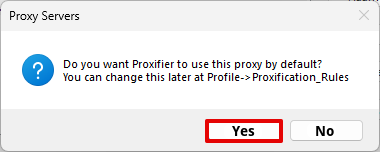
STEP 8: Finally, when you close the Proxifier settings. Next, a window will be displayed on the screen. Click Yes when you want your server to work for all your programs and sites.
Now, check the steps to set up Proxifier HTTP Proxy in a particular program:
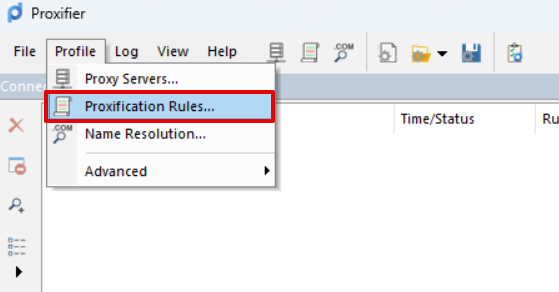
STEP 1: Select the Profile tab and then click "Proxification Rules…" in the program.
STEP 2: Click on Add in the open window.
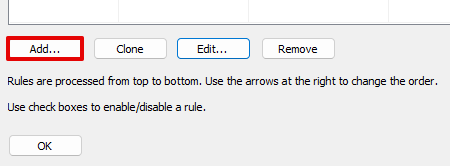
STEP 3: Enter any name in the Name field for the task. (For example, a desired program name).
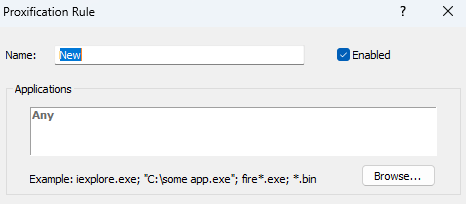
STEP 4: Click the Browse button. Next, choose the path to the program .exe file. It is the one that you want to configure the server for. (Like the path to a game or browser).

STEP 5: At the bottom, choose the desired connection. The section will be next to the Action inscription. (The proxy we already configured as per the instructions above).

STEP 6: Click OK. Close all the open windows.

Moreover, you can check the settings using a browser. Try to fill in the My IP Address field and choose any site you want. It will work if you have configured the proxy for your browser. When the IP of your intermediary and site match, it means the installation was successful.
Finally, setting up a proxy for Proxifier can improve control over network routing. It can improve data flow management. When you configure the profiles correctly and assign the rules for specific applications, you can streamline the connections. With the right approach for Proxifier SOCKS5 proxy and others, you ensure a better resource allocation. This is especially useful for specific applications such as gaming platforms or regional services, where a reliable connection is essential — for example, using a specialized proxy for Origin can significantly improve performance and stability. You can learn more about a high-quality proxy for Origin to protect seamless connectivity.
Moreover, always verify your server credentials and test the connectivity after every setup. On the other hand, some issues may appear during the process. So, you can consult the Proxifier’s log window and check DNS settings.
